How to Grill Pork Chops (Juicy Every Time): Times, Temperatures & Brining
Pork chops have an unfair reputation. Ask most home cooks and they will tell you pork chops always come out dry — so they either avoid them or cook them until they are shoe leather, which only proves the point. The truth is that a grilled pork chop is one of the fastest, cheapest, most forgiving things you can put on the grill. The whole cook takes about 12 minutes. The only reason it goes wrong is that people treat pork like chicken and cook it 20 degrees too far.
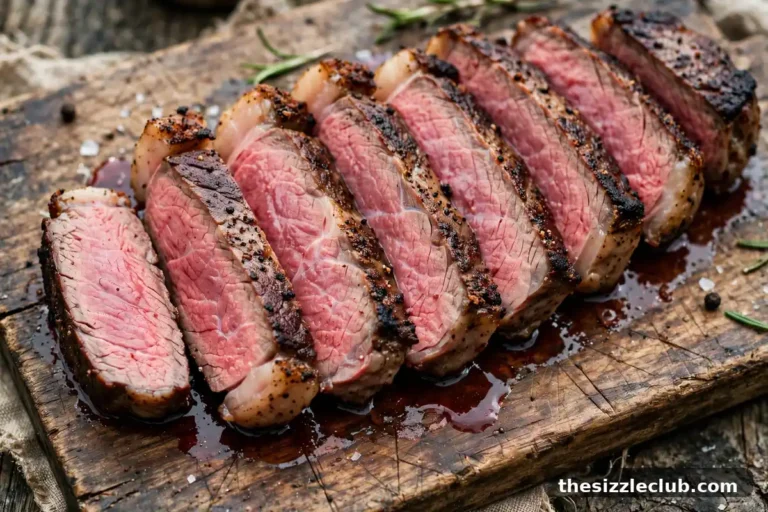
The short answer: grill 1-inch pork chops for 4–5 minutes per side over medium-high heat (400–450°F / 200–230°C) and pull them at 140°F (60°C) internal temperature. After a 3-minute rest, carryover heat brings them to the USDA-safe 145°F (63°C) — juicy, faintly pink in the center, and completely safe. Bone-in chops need about 2 extra minutes per side. The single most important tool is an instant-read thermometer, because the gap between juicy and dry is about 10 degrees.
Key Takeaways
- Pull pork chops at 140°F, not 145°F — the 3-minute rest carries them to the USDA-safe 145°F.
- Buy chops at least 1 inch thick; thin chops dry out before they can brown.
- A simple dry brine (salt, 1 hour or overnight) buys you a bigger margin for error than any gadget.
- Sear over direct heat, finish over indirect heat — two-zone fire for thick or bone-in chops.
- Rest 3–5 minutes before cutting, or the juices run out onto the board.
Why Pork Chops Dry Out (And How to Stop It)
Pork chops dry out for a simple, structural reason: a modern pork chop is very lean. Decades of breeding have produced pork with far less intramuscular fat than the pork your grandparents cooked, and the loin — where chops come from — is the leanest cut on the animal. There is almost no fat inside the meat to keep it moist if you overshoot the temperature, and the window between underdone and overdone is narrow. At 145°F a chop is juicy and tender; at 160°F it is grey, firm, and dry; at 170°F it is a hockey puck.
The second problem is the old 160°F rule. Until 2011, the USDA recommended cooking all pork to 160°F, and a generation of cooks learned that number by heart. The USDA lowered the recommendation to 145°F with a 3-minute rest in 2011, and that change is the single biggest reason modern pork can be juicy. If you are still cooking chops to 160°F, you are cooking them 15 degrees past done — that is the entire difference between a great chop and a dry one.
The fixes are straightforward and they stack: buy thick chops, salt them ahead of time, cook to temperature instead of time, and rest them before cutting. Do all four and dry pork chops become nearly impossible.
Choosing the Right Pork Chops
Not all pork chops are equal, and the choice you make at the butcher counter matters more than anything you do at the grill. Here is what to look for.
Bone-in vs boneless
Bone-in chops are the better grilling choice. The bone insulates the meat closest to it, which slows cooking on that side and gives you a wider margin before the chop overcooks. The meat near the bone also stays noticeably juicier, and bone-in chops are usually cut thicker. Boneless chops cook faster and more evenly, which sounds like an advantage until you realize it also means they overcook faster — there is less room for error. If you are buying boneless, go thicker (at least 1 inch) to compensate. Either way, the bone adds roughly 1–2 minutes per side to the cook.
Thickness matters more than weight
Thickness is the number that decides your cooking time, not weight. A 1-inch chop cooks in about 8–10 minutes total; a ½-inch chop cooks in 4–6 minutes total and can go from raw to overdone in the time it takes to answer a text. Buy chops at least ¾ inch thick, and 1 to 1¼ inches is ideal. If the only chops available are thin-cut (½ inch or less), grill them fast and hot — 2–3 minutes per side — and pull them at 140°F without waiting around.
What to skip at the store
Avoid chops that are pale, almost white, and weeping liquid in the package — that is a sign of meat that was stressed before processing, and it will cook up dry no matter what you do. Look for a healthy pink-red color with a little marbling and a visible fat cap along one edge. That fat cap is your friend: leave it on, score it lightly so it does not curl, and it bastes the chop as it renders. Also skip pre-marinated chops in sweet sauces — the sugar burns on the grill before the meat is done.
Should You Brine Pork Chops?
Brining is the single highest-impact step you can take before grilling, and it is the difference between a chop that forgives a 5-degree overshoot and one that punishes it. There are two kinds, and one is clearly better for grilling.
A dry brine is just salt applied ahead of time — about ½ teaspoon of kosher salt per side for a standard chop. The salt draws moisture out of the surface, dissolves into it, and is then reabsorbed into the meat, seasoning it all the way through and helping the muscle fibers hold onto water during cooking. It also dries the surface, which means a better sear. Apply it 1 hour before grilling at minimum; overnight in the fridge (uncovered, on a rack) is even better.
A wet brine is a saltwater soak — typically ¼ cup of kosher salt per quart of water, plus optional sugar and aromatics — for 1–2 hours. It works, but it adds water to the meat rather than seasoning the meat itself, and that water dilutes flavor and makes the surface wet, which fights against a good sear. Wet-brined chops can also taste slightly hammy if left in the brine too long.
| Method | Time needed | Effect on juiciness | Effect on sear | Verdict |
|---|---|---|---|---|
| Dry brine (salt only) | 1 hour to overnight | Excellent — fibers hold more moisture | Better — dry surface browns fast | Best for grilling |
| Wet brine (salt water) | 1–2 hours | Good — adds water weight | Worse — wet surface steams | Fine, but messier |
| No brine | 0 minutes | Baseline — unforgiving of overshoot | Good | OK if chops are thick |
If you only do one thing from this article, dry-brine your chops. It takes 30 seconds, costs nothing, and it is the step that makes the difference between a good chop and a chop people ask you about.
Pork Chop Grilling Times & Temperatures Chart
Everything below is for a grill running at medium-high heat, 400–450°F, with chops that started at room temperature (out of the fridge for 20–30 minutes). Pull temperatures are 5°F below the USDA target of 145°F, because carryover heat during the rest does the last 5 degrees. Verify with an instant-read thermometer inserted into the thickest part, away from the bone.
| Chop thickness | Grill temp | Time per side (boneless) | Time per side (bone-in) | Pull temp | Final temp after rest |
|---|---|---|---|---|---|
| ½ inch | 450°F | 2–3 minutes | 3–4 minutes | 140°F (60°C) | 145°F (63°C) |
| ¾ inch | 425–450°F | 3–4 minutes | 4–5 minutes | 140°F (60°C) | 145°F (63°C) |
| 1 inch | 400–450°F | 4–5 minutes | 5–6 minutes | 140°F (60°C) | 145°F (63°C) |
| 1¼ inches | 400°F | 5–6 minutes, then finish indirect | 6–7 minutes, then finish indirect | 140°F (60°C) | 145°F (63°C) |
| 1½ inches or thicker | 400°F | Sear 3–4 min/side, then indirect 8–12 min | Sear 3–4 min/side, then indirect 10–14 min | 140°F (60°C) | 145°F (63°C) |
The rule of thumb behind the chart: about 4–5 minutes per side per inch of thickness at 400–450°F, plus 1–2 minutes per side if the chop is bone-in. For chops 1¼ inches or thicker, sear first and finish on the indirect side — direct heat alone will burn the outside before the center catches up. That two-zone approach is the same setup in our two-zone fire guide (https://thesizzleclub.com/two-zone-fire-setup/), and it is worth learning once and using forever.
Two honest notes on safety. First, 145°F with a 3-minute rest is the USDA minimum safe temperature for whole cuts of pork, and a faint blush of pink in the center at that temperature is normal and safe — it is not undercooked. Second, that guidance is for whole cuts like chops, steaks, and roasts. Ground pork is different: it must reach 160°F, because grinding mixes surface bacteria through the meat. Do not apply chop temperatures to burgers or sausage.
Step-by-Step: Grilling Pork Chops
Here is the full method, using a real example you can copy exactly: four bone-in rib chops, 1 inch thick, about 8 ounces each, dry-brined overnight, grilled on a gas grill at 425°F.
1. Dry-brine ahead of time. The night before, sprinkle ½ teaspoon of kosher salt on each side of every chop and set them on a wire rack over a tray, uncovered, in the fridge. If you only have an hour, that works too — salt, leave on the counter for 45–60 minutes, and pat dry before grilling. Do not add pepper yet; pepper burns over direct heat, so it goes on after the sear or in the final seasoning.
2. Bring to room temperature. Take the chops out of the fridge 20–30 minutes before grilling. Cold meat on a hot grill cooks unevenly — the outside overcooks while the center is still catching up. Pat the surface dry with paper towels; a dry surface is what browns.
3. Set up a two-zone fire. On a gas grill, turn half the burners to medium-high and leave the other half off or on low. On charcoal, bank the coals to one side. Preheat with the lid closed for 10–15 minutes until the hot side reads 425°F. Brush the grates clean. If you have not set up a two-zone fire before, our two-zone fire setup guide (https://thesizzleclub.com/two-zone-fire-setup/) walks through it for gas and charcoal.
4. Oil and season. Brush the chops lightly with a high-smoke-point oil (avocado oil or refined olive oil) and season with black pepper and garlic powder. The oil helps the seasoning stick and prevents the chops from bonding to the grates.
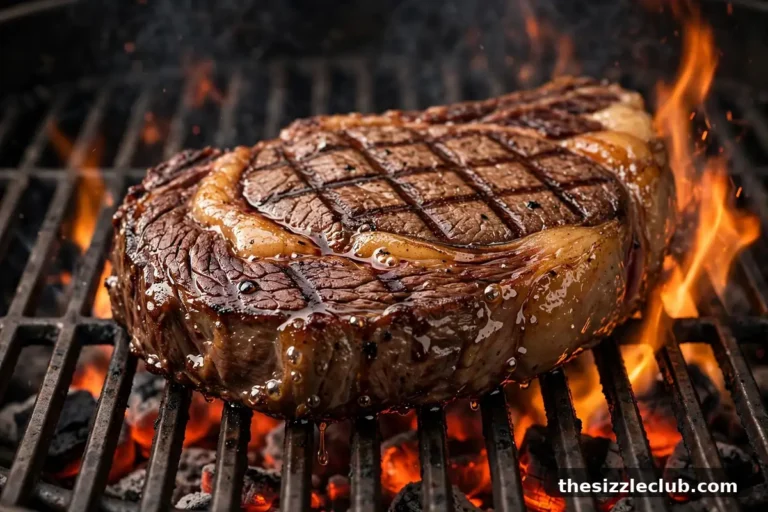
5. Sear over direct heat. Lay the chops on the hot side, fat-cap edge down first for 30 seconds if the cap is thick — that renders the fat and seasons the grates. Then lay them flat and do not move them for 5 minutes. Moving a chop early tears the crust. At 5 minutes, check for good browning, flip once, and season the second side. Our four chops took 5 minutes on the first side and 5 minutes on the second side at 425°F.
6. Check the temperature, not the clock. At the 10-minute mark, insert an instant-read thermometer horizontally into the thickest part of the thickest chop, keeping the tip away from the bone (bone reads hotter than meat and lies to you). Ours read 138–141°F across the four chops. Anything under 140°F stays on the grill for another minute; anything at 140°F comes off. If a chop is lagging, move it to the indirect side and close the lid for 2–3 minutes rather than leaving it over the flame.
7. Rest before cutting. Move the chops to a plate or a warm cutting board, tent loosely with foil, and rest for 3–5 minutes. In our cook, the centers rose from 140°F to 145–146°F during the rest, and the chops stayed juicy enough that the cutting board stayed nearly dry — the sign that the juices stayed inside the meat. Total time from grill to table: about 15 minutes. For the science of why this matters, see our guide on how long to rest meat (https://thesizzleclub.com/resting-meat-how-long/).
A Real Cook Log: Four Chops, Four Thicknesses
Charts are useful, but they hide how much thickness actually matters. So here is a real cook log from one evening on a gas grill at 425°F — four chops of different thicknesses, all dry-brined, all cooked the same way, with the actual times and temperatures recorded:
| Chop | Weight | Thickness | Bone? | Time per side | Pull temp | Final temp | Result |
|---|---|---|---|---|---|---|---|
| A | 5 oz | ½ inch | Boneless | 2.5 min | 141°F | 145°F | Juicy, but only just — 30 seconds more would have dried it out |
| B | 7 oz | ¾ inch | Boneless | 3.5 min | 139°F | 144°F | Very good — the sweet spot for weeknights |
| C | 8 oz | 1 inch | Bone-in | 5 min | 140°F | 145°F | Excellent — best balance of crust and juiciness |
| D | 12 oz | 1½ inches | Bone-in | 4 min sear + 10 min indirect | 140°F | 146°F | Best of all — thick chop, edge-to-edge pink, deep crust |
Three things this cook log proves. First, a half-inch difference in thickness nearly doubles the cooking time — chop A took 5 minutes total, chop D took 18. Second, the bone really does buy you time: chop C tolerated the same heat for longer than a boneless chop of the same thickness would have. Third, the thickest chop was the best chop — the extra thickness gives you a deep brown crust on the outside while the center stays pink and juicy, something a thin chop physically cannot do. If your butcher sells thick-cut chops, buy them. It is the easiest upgrade in grilling.
Bone-In vs Boneless: Does the Bone Actually Help?
Yes, and not for the reason people usually give. The old claim that the bone “adds flavor” is mostly myth — flavor lives in fat and browning, not in bone. What the bone actually does is slow down heat transfer. Bone is a poor conductor of heat, so the meat around it cooks more slowly than the rest of the chop. That is a feature, not a bug: it widens your margin of error by a couple of minutes, which is exactly the margin that separates juicy from dry.
Bone-in chops also tend to be cut from the rib end of the loin, which has a little more fat and a better fat cap than the center-cut boneless chops sold in most supermarkets. And there is a practical bonus: the bone makes a built-in handle and a doneness check — the meat pulls back slightly from the bone as it cooks, and the flesh near the bone is the last part to reach temperature, so if that spot reads 140°F, the whole chop is done.
Boneless chops are not a bad choice — they are easier to eat, easier to slice for sandwiches, and they cook more evenly. They just demand more attention: use the times in the chart, check the temperature a minute earlier than you think you need to, and never walk away from the grill. If you buy boneless, buy thick.
Mistakes That Ruin Grilled Pork Chops
Cooking to 160°F. The old USDA number, still the number one cause of dry pork. Cook to 145°F final — which means pulling at 140°F and resting. If you are cooking for someone who is nervous about pink pork, show them the USDA guidance: 145°F with a 3-minute rest is the official safe temperature, and it has been since 2011.
Buying thin chops. A ½-inch chop has no margin. It goes from raw to overdone in about 60 seconds, and it cannot develop a real crust without overcooking the center. Buy 1 inch or thicker, every time.
Skipping the thermometer. Guessing doneness by pressing the meat or cutting into it is unreliable, and cutting into a chop to check lets the juices out. A $15 instant-read thermometer pays for itself the first time it saves a dinner. If you want to understand why the sear matters so much, our guide to grilling the perfect steak (https://thesizzleclub.com/grill-perfect-steak/) covers the same crust-and-temperature logic in detail.
Moving the chop too soon. A chop that is still bonding to the grate is not ready to flip. Leave it alone for the full first side — it will release on its own when the crust forms. Forcing it tears the surface and leaves the browned crust stuck to the grill.
Cutting into it immediately. A chop cut the second it leaves the grill loses a visible pool of juice on the board. Three minutes of rest lets the muscle fibers relax and reabsorb that moisture. It is the cheapest improvement in this entire article, and it costs you nothing but patience.
Drowning it in barbecue sauce from the start. Sweet sauce burns over direct heat, and a burnt sugary coating tastes bitter no matter how good the meat is. Grill the chop plain, and brush sauce on during the last 2 minutes — or serve it on the side.
What to Serve With Grilled Pork Chops
Grilled pork chops are a weeknight main, so the sides should be simple and mostly grillable alongside them. Grilled corn on the cob and zucchini can share the grill while the chops rest — they need the same medium-high heat and about the same time. Applesauce is the classic pairing for a reason: the sweetness and acidity cut through the richness of the pork, and a spoonful of whole-grain mustard does the same job with a sharper edge. For starch, roasted potatoes, rice pilaf, or a crusty roll all work. Keep the plate simple and let the chop be the star.
Leftovers keep well. Refrigerate within 2 hours in an airtight container and use within 3–4 days. Reheat gently — a 275°F oven for 10 minutes, or a quick sear in a buttered skillet — and never microwave on high, which takes leftover pork from juicy to rubbery in seconds. Cold sliced pork chops are also excellent in sandwiches the next day.
FAQ
How long do you grill pork chops at 400°F?
At 400°F, 1-inch boneless pork chops take 4–5 minutes per side (8–10 minutes total). Bone-in chops of the same thickness take 5–6 minutes per side. Always verify with a thermometer and pull at 140°F, letting the rest carry them to the USDA-safe 145°F.
What temperature should pork chops be grilled to?
The USDA safe temperature for pork chops is 145°F (63°C) with a 3-minute rest. Pull the chops off the grill at 140°F and rest them for 3–5 minutes — carryover heat brings them up to 145°F. A faint pink center at 145°F is normal and safe.
Should you brine pork chops before grilling?
It helps a lot. A dry brine — ½ teaspoon of kosher salt per side, applied 1 hour to overnight before grilling — seasons the meat through and helps it hold moisture, giving you a wider margin against overcooking. A wet brine also works but makes the surface wet and the sear weaker.
Why are my grilled pork chops always dry?
Almost always one of three reasons: the chops were too thin, they were cooked past 145°F, or they were cut into without resting. Buy chops at least 1 inch thick, pull them at 140°F with a thermometer, and rest 3–5 minutes before cutting. Fix those three and dry chops disappear.
Can you grill frozen pork chops?
You can, but you should not if you can avoid it. Frozen chops cook unevenly — the outside overcooks while the center is still thawing — and they will not brown properly because the surface stays wet. Thaw in the fridge overnight, or in cold water for about 30 minutes, and the cook goes back to normal.
Bottom Line
Grilled pork chops are not a difficult cook — they are a precise one. Buy chops at least an inch thick, dry-brine them with salt, grill them over a two-zone fire at 400–450°F, pull them at 140°F, and rest them for 3 minutes so they finish at the USDA-safe 145°F. Do that, and a 1-inch bone-in chop is on the table in about 15 minutes: browned and crusted on the outside, faintly pink and juicy in the center, and nothing like the dry pork chops you grew up dreading. Once you cook them this way, the old 160°F rule is gone for good.