Ribs 101: Baby Back vs Spare and the 3-2-1 Method
The 3-2-1 method is the most beginner-friendly path to tender smoked ribs: 3 hours of unwrapped smoke, 2 hours wrapped, 1 hour unwrapped to finish, all at 225 degrees F. It works because each phase has a job: smoke builds bark and flavor, the wrap braises the meat tender, and the final hour firms the bark back up. But before you light the cooker, you need to know which ribs you bought, because baby backs and spares do not cook on identical timelines.
Baby Back vs Spare vs St. Louis: The Cut Differences
All pork ribs come from the same general area, but where they are cut changes everything about how they cook.
Baby Back Ribs
Cut from the upper rib cage near the loin, baby backs are shorter, leaner, and more curved. They cook faster, typically 4 to 5 hours unwrapped, and their leaner meat means they can dry out if overcooked. Choose baby backs when you want a quicker cook and meatier, leaner bites.
Spare Ribs
Cut from the lower belly side, spares are larger, flatter, fattier, and more flavorful. The full 3-2-1 method was designed around spare ribs, and their fat keeps them juicy through the long cook. Choose spares when you want the classic, rich barbecue rib experience and have 6 hours to give.
St. Louis Style
St. Louis ribs are spare ribs trimmed into a neat rectangle, with the brisket bone section and skirt removed. They cook like spares but more evenly, since the uniform shape eliminates thin edges that overcook. If your store sells St. Louis cut, it is the easiest spare-style rib to cook well.
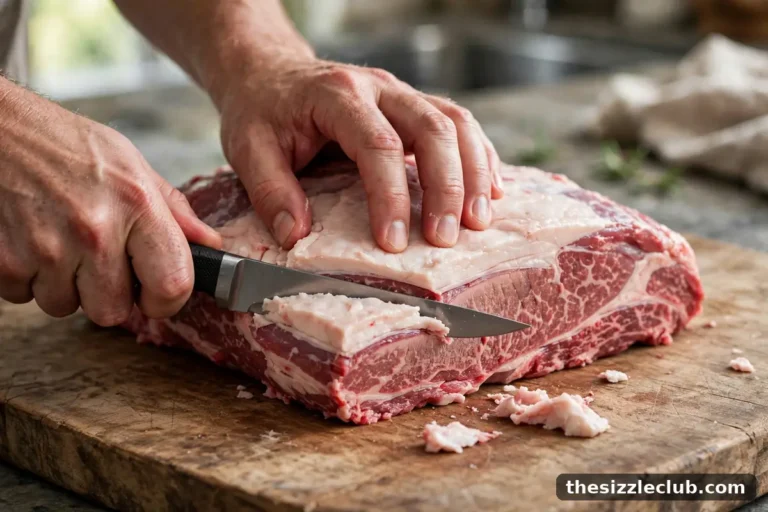
You can also trim full spares into St. Louis style yourself: square off the rack by removing the thin brisket-bone section along one long edge and the flap of skirt meat on the bone side. The trimmings are not waste; the rib tips cook faster and make excellent snacks or a rich addition to baked beans. A uniform rectangle cooks more evenly than a full spare with its thin tapered end, which is why competition cooks almost always trim. It takes five minutes with a sharp knife and instantly makes your ribs cook like the more expensive pre-trimmed cut.
The practical rule: use the full 3-2-1 timing for spares and St. Louis, and shorten it to roughly 2-2-1 for baby backs. Same method, scaled to the cut.
Membrane Removal: The 2-Minute Prep Step
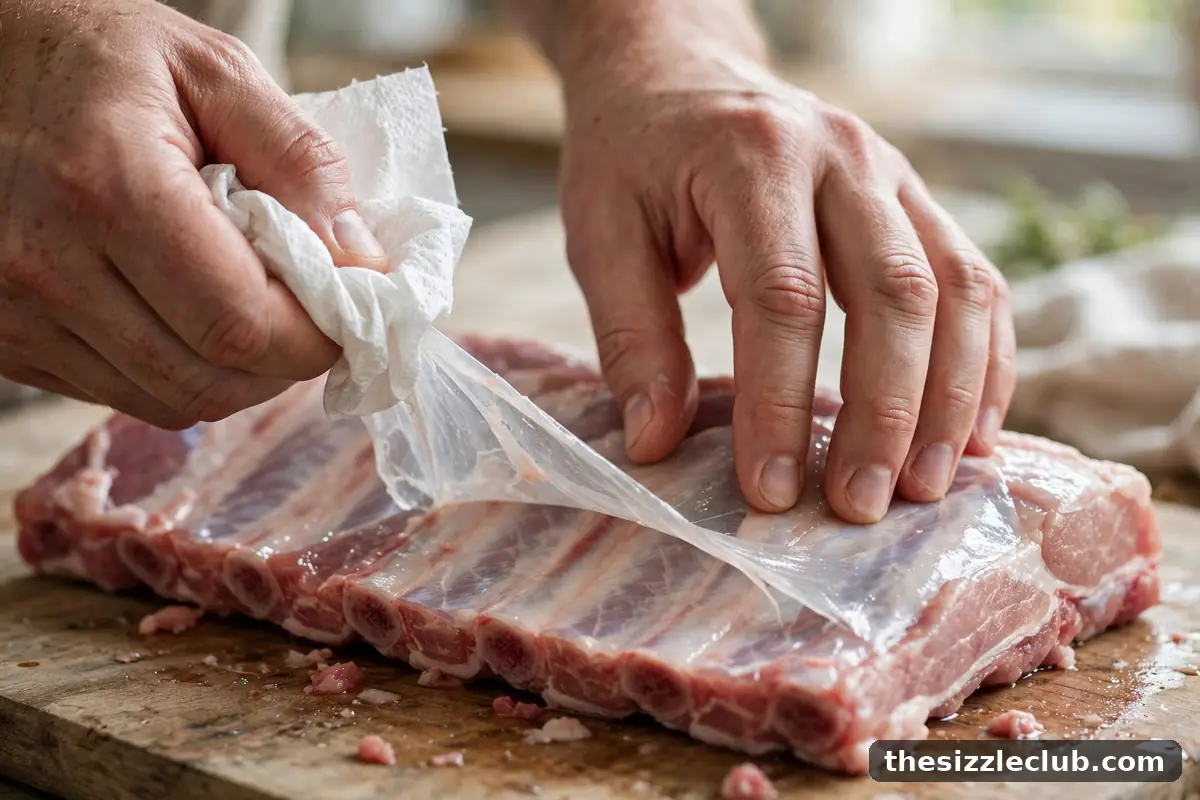
The underside of every rack has a thin, silvery membrane (the peritoneum) covering the bones. Left on, it turns papery and chewy, blocks smoke and rub from the bone side, and makes ribs harder to bite through. Removing it takes two minutes:
- Slide a butter knife under the membrane at one end of the rack to lift an edge.
- Grip the lifted edge with a paper towel for traction.
- Pull steadily across the rack; it usually comes off in one or two sheets.
- If it tears, lift a new edge and continue until the bone side is clean.
Season both sides after the membrane is off: a simple rub of salt, pepper, paprika, garlic powder, and a little brown sugar works on any rib cut. Apply the rub at least an hour before cooking, or overnight for deeper flavor.
The 3-2-1 Method Explained Phase by Phase
Set your cooker to a steady 225 degrees F. The numbers in 3-2-1 are hours, and they assume spare or St. Louis ribs; scale down for baby backs.
Phase 1: 3 Hours of Smoke (Unwrapped)
Place the ribs bone-side down on the grate, away from direct heat. This phase builds the bark, the dark seasoned crust, and lays down the smoke flavor. Do not open the lid. At the end of 3 hours the ribs should have a deep mahogany color and the bark should look set rather than wet.
Phase 2: 2 Hours Wrapped
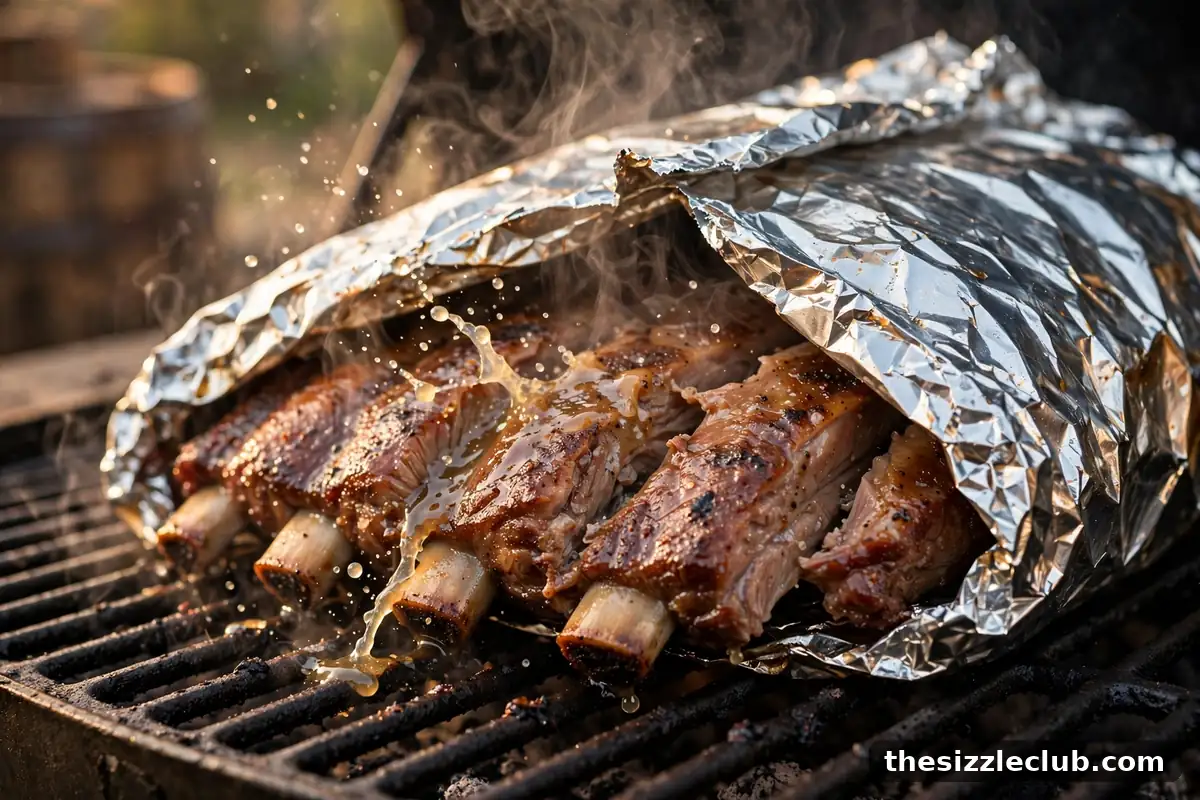
Lay each rack on heavy-duty foil, add a splash of liquid (apple juice, beer, or even water) and a drizzle of honey or a few pats of butter if you like, then seal the foil tightly. Return to the cooker bone-side up. The wrap braises the ribs in their own steam, pushing through the stall and tenderizing the connective tissue. This phase does most of the tenderizing work.
Phase 3: 1 Hour Unwrapped
Unwrap the ribs, return them to the grate bone-side down, and cook one final hour. This firms the bark back up after the steam bath and finishes rendering. This is also when sauce goes on, if you are saucing (see below). The ribs are done when they pass the tests in the next section, not merely when the hour ends.
Doneness Tests: Bend, Twist, and Toothpick
Ribs are done when the meat has pulled back from the bone ends by about a quarter to a half inch and the rack passes one of these tests. Internal temperature is a poor guide for ribs because the thin meat and bones make probe readings unreliable.
- The bend test: pick up the rack in the center with tongs. A done rack bends nearly 90 degrees and the surface cracks slightly. If it stays stiff, it needs more time; if it falls apart, it went too far.
- The twist test: grip a center bone and twist gently. In done ribs the bone twists freely in the meat without the meat falling off entirely.
- The toothpick test: slide a toothpick between the bones. It should glide in with little resistance, like probing soft butter.
Aim for tender with a slight chew, where the meat pulls cleanly from the bone but does not slide off at a glance. Competition-style bite-through is the target; fall-off-the-bone is actually overcooked, whatever the restaurants imply.
Saucing: When and How Without Burning the Sugars
Most barbecue sauces are sugar-heavy, and sugar burns over direct or prolonged high heat. The rule is simple: sauce late and sauce thin. Apply the first light coat during the last 20 to 30 minutes of Phase 3, let it tack up on the cooker, then add a second thin coat 10 minutes later if you want more coverage. Two thin layers beat one thick gloppy one every time.
Alternatively, serve ribs dry with sauce on the side. Dry ribs show off your bark and smoke, and guests sauce to taste. There is no rule that ribs must be sauced; some of the most respected barbecue traditions never sauce at all.
Decision Criteria: Which Rib and Which Timeline
Choose your cut and method with two questions. How much time do you have? Six hours means spares with full 3-2-1; four to five hours means baby backs at 2-2-1. What texture do you want? For maximum bark and chew, consider cooking unwrapped the whole way once you have the basics down; for guaranteed tenderness on a first attempt, follow 3-2-1 exactly. After two or three cooks you will know whether you prefer your ribs closer to competition bite or backyard tender, and you can adjust the wrap time up or down by 30 minutes to move the needle.
Mistakes to Avoid
- Leaving the membrane on. It turns chewy and blocks flavor from the bone side.
- Using 3-2-1 timing on baby backs. They are leaner and smaller; scale to 2-2-1 or they overcook.
- Saucing too early. Sugar burns; sauce only in the final stretch.
- Cooking by time alone. Finish with the bend test, not the clock.
- Chasing fall-off-the-bone. Meat sliding off the bone is overcooked; aim for a clean bite that pulls from the bone.
- Opening the lid during Phase 1. Every peek costs smoke time and temperature stability.
Key Takeaways
- Spares and St. Louis ribs suit the full 3-2-1 method; baby backs need a shorter 2-2-1 version.
- Remove the membrane and season both sides before the ribs hit the cooker.
- 3-2-1 means 3 hours smoke, 2 hours wrapped with liquid, 1 hour unwrapped to finish at 225 degrees F.
- Judge doneness with the bend, twist, or toothpick test, not a thermometer.
- Sauce late and thin, or serve dry with sauce on the side.
Frequently Asked Questions
What temperature do you smoke ribs at for 3-2-1?
225 degrees F is the classic target. You can run 250 degrees F to shorten the cook slightly, but keep the phase ratios roughly the same and rely on the bend test to confirm doneness either way.
Do I have to wrap ribs?
No. Wrapping speeds tenderizing and guarantees juicy results, which is why 3-2-1 is beginner-friendly. Unwrapped ribs take longer but develop firmer, darker bark. Try wrapped first, then experiment with unwrapped once you can read doneness confidently.
How do I know when ribs are done without a thermometer?
Use the bend test: lift the rack in the center with tongs and look for a near-90-degree bend with slight surface cracking. The meat should also have pulled back from the bone ends, and a bone should twist freely when gripped. These visual and tactile tests are more reliable than probe readings on thin rib meat.
Why are my ribs tough?
Tough ribs are almost always undercooked, not overcooked. The connective tissue needs enough time in the wrap phase to break down. If the bend test shows a stiff rack, wrap and give it another 30 to 45 minutes rather than assuming the time was sufficient.
For longer cooks in the same low-and-slow family, see our pork shoulder and pulled pork guide, and keep our grilling times and temperatures chart handy for the quick-cooking cuts you will grill between smoke sessions. Next action: Buy one rack of St. Louis cut ribs, remove the membrane tonight, and run the full 3-2-1 this weekend without improvising. Write down what the bend test felt like at the finish so your second rack starts from knowledge, not hope.